 Edward Harrington
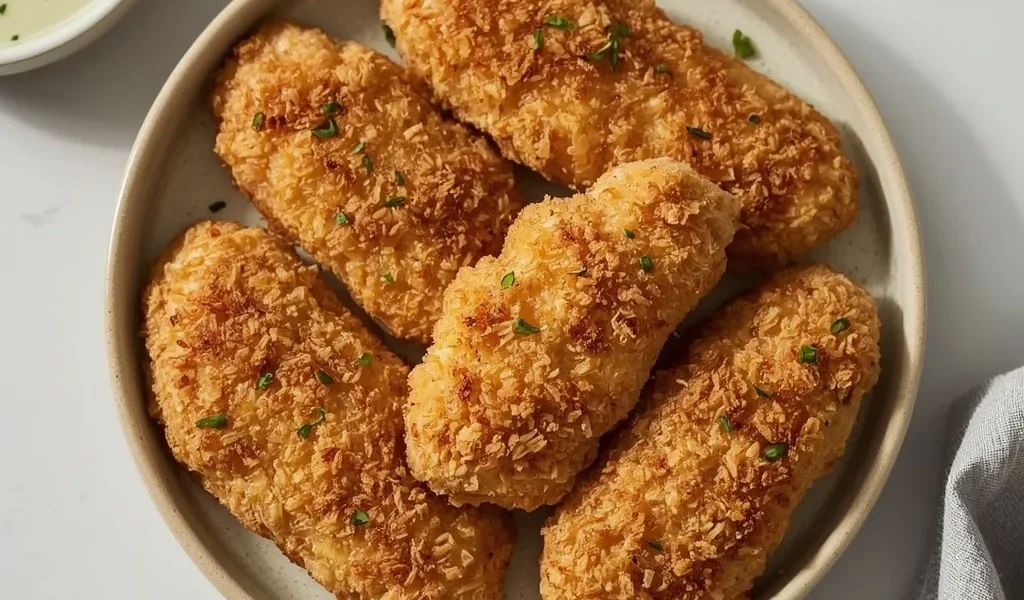
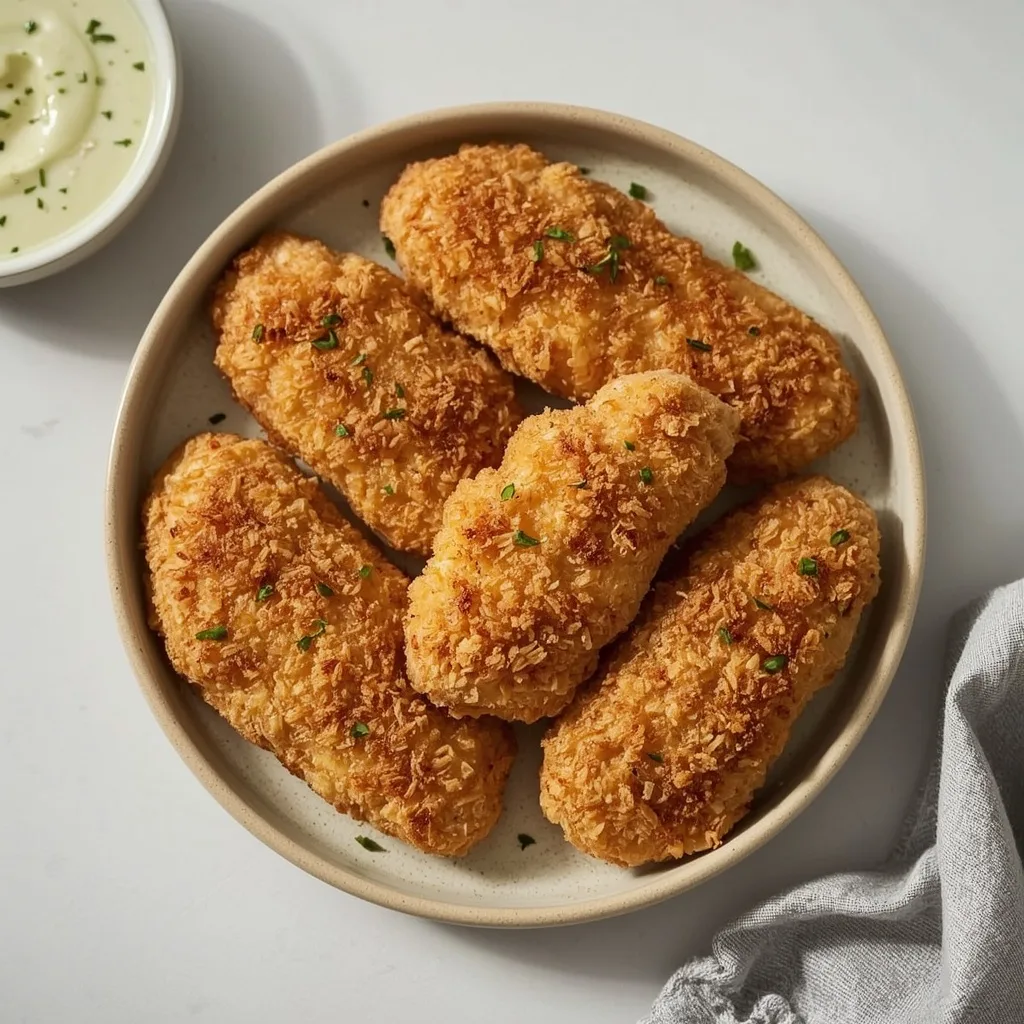
 Giada Crunchy Parmesan Chicken Tenders are exactly what weeknight dinners need — juicy chicken strips coated in a crisp, cheesy crust that bakes up golden in just 15 minutes. This Italian-American twist uses a mix of panko breadcrumbs and freshly grated Parmesan for a coating that stays crunchy without drowning in oil.
They come together in 30 minutes from start to finish and are beginner-friendly, though the wire rack setup is one step you should not skip. Serve them as a main course with a side salad or as a crowd-pleasing appetizer for game day.
What are Giada’s Crunchy Parmesan Chicken Tenders?
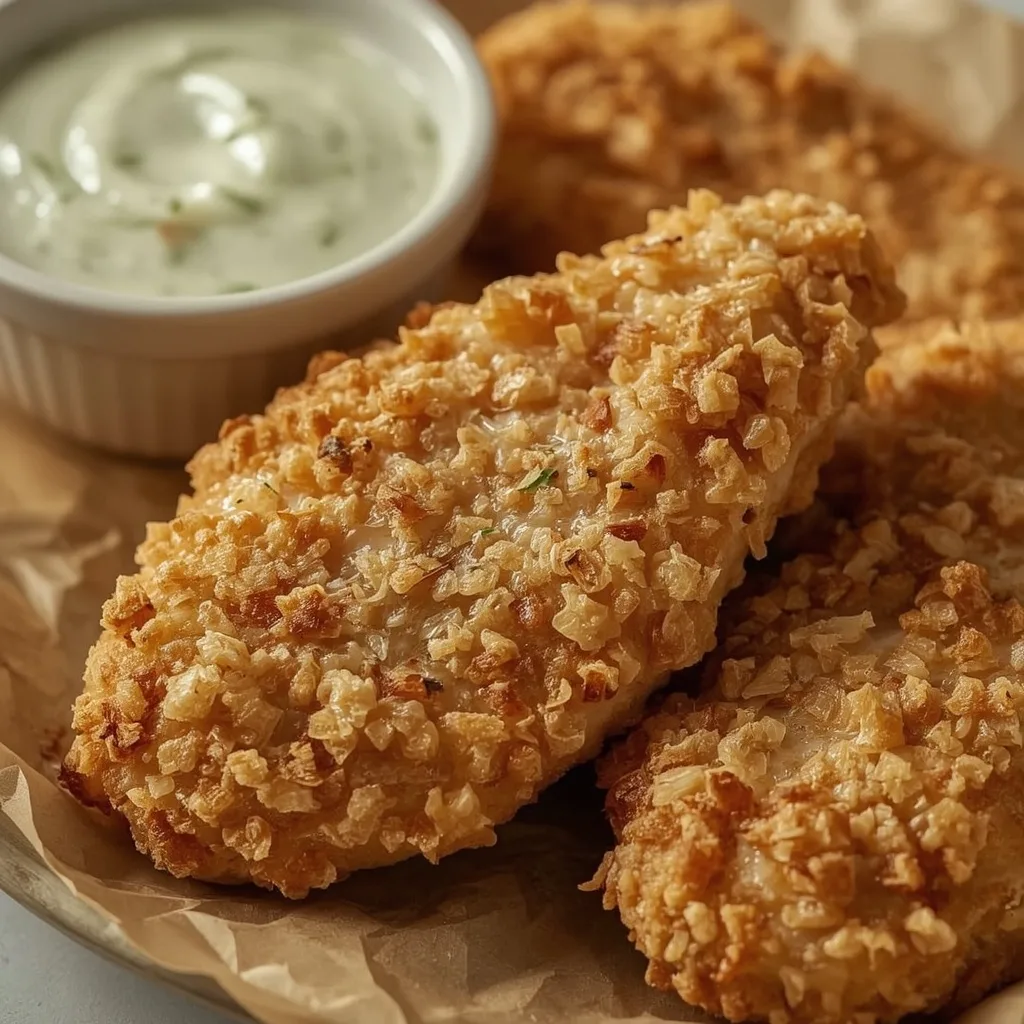
These are chicken breast strips coated in a seasoned flour, egg wash, and a crust of panko and Parmesan, then baked on a wire rack until deep golden. The crust comes out shatteringly crisp while the meat stays moist and tender inside. It is a baked alternative to fried tenders that does not sacrifice crunch.
Why This Recipe Works
- Wire rack baking — The raised rack allows hot air to circulate fully around each tender, crisping the bottom crust instead of steaming it on a solid pan.
- Panko and Parmesan combo — Panko provides light, flaky crunch while Parmesan adds savory depth and helps brown the crust evenly in the oven.
- Three-step breading — Flour first, then egg wash, then panko creates layers that lock in moisture and prevent the coating from sliding off during baking.
- Olive oil spray on top — A light mist of oil before baking transforms the crust from pale and dry to golden and crackly without deep frying.
- Short rest after baking — Letting the tenders sit on the rack for 2-3 minutes sets the crust so it stays crunchy when you cut into it.
Ingredients You’ll Need
You probably have most of these already. Here is what each ingredient does and what to look for.
For the Chicken
- 1 1/2 pounds boneless, skinless chicken breasts — Cut into 1-inch wide strips for even cooking. Pat them dry so the coating sticks properly.
For the Breading Station
- 1/2 cup all-purpose flour — Creates the dry base layer that helps the egg wash cling to the chicken. No need for gluten-free flour here unless swapping.
- 2 large eggs, lightly beaten — Acts as glue between the flour and panko layers. Lightly beaten means no streaks of white remain.
- 2 tablespoons whole milk — Thins the eggs slightly for even coverage. Any milk works, but whole gives a richer wash.
- 1 cup panko breadcrumbs — The key to crunch. Panko is lighter and flakier than regular breadcrumbs and stays crisp after baking.
- 1/2 cup freshly grated Parmesan cheese — Pre-grated stuff does not melt or brown the same. Grate it yourself from a block for the best texture and flavor.
- 1 teaspoon kosher salt — Split between the flour and the panko mixture. Kosher salt dissolves evenly and seasons without over-salting.
- 1/2 teaspoon freshly ground black pepper — Also divided between the two dry mixtures for balanced seasoning throughout.
- 1/2 teaspoon garlic powder — Adds savory depth to the crust without burning like fresh garlic would.
- 1/2 teaspoon paprika — Gives the coating a warm color and mild sweetness. Smoked paprika works too for a different flavor.
- Olive oil cooking spray — Critical for browning. Do not skip this — it makes the difference between pale and golden.
Kitchen Tools You’ll Need
- Rimmed baking sheet — Catches any drips from the rack. A half-sheet pan fits most ovens and gives enough space for all tenders.
- Wire rack — Fits inside the baking sheet and lifts the chicken off the bottom. A cooling rack with a grid pattern works best for airflow.
- Three shallow dishes — Pie plates or wide bowls work. You need one for flour, one for eggs, and one for the panko mixture.
- Instant-read thermometer — Ensures the thickest tender hits 165°F / 74°C. Optional if you trust visual cues, but recommended for food safety.
- Tongs or one hand for dry, one for wet — Keeps the breading station tidy and prevents the flour from clumping in the egg wash.
How to Make Giada Crunchy Parmesan Chicken Tenders
Set up your stations before you touch the chicken — it makes the process smooth and fast. Here is the step-by-step.
- Preheat and prep the rack — Preheat oven to 425°F / 218°C. Line a rimmed baking sheet with foil and place a wire rack on top. Spray the rack generously with olive oil cooking spray to prevent sticking and promote even crisping.
- Build the breading station — In one shallow dish, mix flour with 1/2 teaspoon salt and 1/4 teaspoon pepper. In a second dish, whisk eggs and milk until uniform. In a third dish, combine panko, Parmesan, remaining 1/2 teaspoon salt, remaining 1/4 teaspoon pepper, garlic powder, and paprika. Mix with a fork until evenly distributed.
- Prep the chicken — Pat the chicken strips dry with paper towels to remove excess moisture, which ensures the coating adheres properly. Season lightly with a pinch of salt and pepper on both sides.
- Dredge in flour — Dredge each chicken strip first in the seasoned flour, shaking off any excess. This dry layer helps the egg wash cling to the chicken.
- Dip in egg wash — Next, dip the floured strip into the egg mixture, turning to coat completely. Allow any excess to drip back into the dish.
- Press into panko — Finally, press the chicken strip into the panko-Parmesan mixture, turning and pressing firmly to create an even, thick crust. Place the coated strip on the prepared wire rack. Repeat with remaining chicken, arranging tenders in a single layer without touching for best browning.
- Spray and bake — Lightly spray the tops of the tenders with olive oil cooking spray. This step is critical for achieving a golden, crunchy crust instead of a pale, dry one. Bake for 12-15 minutes, until the coating is deep golden brown and crisp. The internal temperature of the thickest tender should reach 165°F / 74°C when checked with an instant-read thermometer.
- Rest and serve — Remove from the oven and let rest on the rack for 2-3 minutes before serving. This brief rest allows the crust to set and the juices to redistribute, preventing sogginess.
Common Mistakes to Avoid (And How to Fix Them)
- Skipping the wire rack — The bottom of the tenders steams instead of crisps. Fix this by always baking on a rack — it is the single biggest factor for crunch.
- Overcrowding the pan — Tenders that touch trap steam and soften the crust. Space them at least 1/2 inch apart on the rack so air flows around each piece.
- Using pre-shredded Parmesan — It contains anti-caking agents that prevent melting and browning. Grate your own from a block for the crust to crisp properly.
- Forgetting the oil spray — Dry panko stays pale and crumbly without oil. A light mist from 6-8 inches away gives the coating the fat it needs to brown.
- Skipping the flour step — Without flour, the egg wash slides off and the panko falls away during baking. That first dry layer is essential for adhesion.
- Not drying the chicken — Wet meat makes the flour turn pasty and the coating slip. Pat the strips thoroughly with paper towels before you start.
Helpful Tips for Perfect Giada Crunchy Parmesan Chicken Tenders
- Press the panko firmly — Use your fingertips to press the breadcrumb mixture into the chicken on both sides. A loose coating falls off during baking; a pressed one stays put.
- Use one hand for wet, one for dry — Keep your left hand (or non-dominant) for the flour and panko and your right hand for the egg wash. This prevents clumpy fingers and messy breading.
- Check the oven temperature — Ovens run hot or cold. If your tenders are still pale at 12 minutes, let them go the full 15. If they brown too fast, reduce heat to 400°F / 204°C next time.
- Cut chicken breasts evenly — Aim for strips that are all about 1 inch wide. Uneven sizes mean some overcook while others stay underdone.
- Spray from above, not from the side — Hold the spray can about 8 inches above the tenders and mist in a sweeping motion. Side sprays blow the panko off.
- Let leftovers rest uncovered — If storing, let the tenders cool completely on the rack before refrigerating. Covering warm tenders traps steam and ruins the crunch.
Easy Ingredient Substitutions for Giada’s Crunchy Parmesan Chicken Tenders
- Panko → crushed cornflakes or pork rinds — Crushed cornflakes add extra crunch and a slight sweetness. Crushed pork rinds work for low-carb versions with the same crispy texture.
- Parmesan → pecorino Romano or Asiago — Pecorino is saltier and sharper, so reduce the added salt by 1/4 teaspoon. Asiago melts slightly more but still browns well.
- Whole milk → buttermilk or Greek yogurt thinned with water — Buttermilk adds tang and tenderizes the meat slightly. Thin Greek yogurt with 1 tablespoon of water to reach the same consistency.
- All-purpose flour → almond flour or cornstarch — Almond flour works for gluten-free and adds a nutty flavor. Cornstarch makes the crust even crisper, but watch for quicker browning.
- Paprika → smoked paprika or cayenne — Smoked paprika adds a deeper, smoky flavor. Cayenne gives heat — use 1/4 teaspoon max unless you want serious spice.
- Olive oil spray → avocado oil spray — Avocado oil has a higher smoke point and neutral flavor, making it a fine substitute that still helps the crust brown.
Easy Ways to Customize Giada Crunchy Parmesan Chicken Tenders
- Herb-crusted tenders — Add 1 tablespoon dried Italian seasoning or 2 tablespoons chopped fresh parsley to the panko mixture for a herbaceous twist.
- Spicy buffalo tenders — Toss the baked tenders in 2 tablespoons of melted butter mixed with 3 tablespoons of hot sauce. Serve with ranch or blue cheese dip.
- Lemon- pepper tenders — Add the zest of one lemon and 1/2 teaspoon more black pepper to the panko. Finish with a squeeze of fresh lemon juice after baking.
- Everything bagel tenders — Replace 2 tablespoons of panko with everything bagel seasoning (sesame seeds, poppy seeds, garlic, onion, salt). Skip the added salt in the panko.
- Cheese- stuffed tenders — Cut a small pocket into each chicken strip before breading and stuff with a cube of mozzarella or provolone. Seal the edges with a toothpick before breading.
- Gluten-free version — Use almond flour for the first breading step and gluten-free panko for the crust. All other ingredients stay the same — check your paprika and garlic powder for gluten.
Best Ways to Store Giada Crunchy Parmesan Chicken Tenders
- Refrigerating leftovers — Place cooled tenders in an airtight container lined with a paper towel. Layer paper towels between each strip to absorb moisture. Keeps for up to 3 days.
- Freezing uncooked tenders — Assemble the tenders as directed but do not bake. Arrange on a parchment-lined baking sheet and freeze solid, about 2 hours. Transfer to a zip-top bag and freeze for up to 2 months.
- Freezing baked tenders — Let them cool completely on the rack. Freeze in a single layer on a baking sheet, then transfer to a freezer-safe container with parchment between layers. Best within 1 month.
- Avoid stacking warm tenders — If you stack them while warm, the steam softens the crust immediately. Always cool on the rack to room temperature before any storage.
Best Ways to Reheat Leftovers
- Oven method (best for crunch) — Preheat to 375°F / 190°C. Place tenders on a wire rack over a baking sheet and bake for 5-7 minutes. The rack keeps the bottom from steaming.
- Air fryer method — Preheat to 350°F / 175°C. Add tenders in a single layer and cook for 3-4 minutes, shaking halfway. This restores the crust closest to fresh-baked texture.
- Microwave method (quickest, softest) — Place tenders on a microwave-safe plate lined with a paper towel. Heat in 30-second bursts for 1-2 minutes total. The crust will be soft, not crunchy.
- Reheating from frozen — If you froze uncooked tenders, bake them directly from frozen at 425°F / 218°C, adding 3-4 minutes to the cook time. No need to thaw first.
Nutritional Breakdown (per serving)
Based on 1 serving = 1 portion out of 4 total.
- Calories: 395
- Protein: 43g
- Fat: 10g
- Saturated Fat: around 3g
- Carbohydrates: 28g
- Fiber: about 1g
- Sugar: roughly 2g
- Sodium: 795mg
- Cholesterol: about 155mg
FAQs
Can I freeze Giada Crunchy Parmesan Chicken Tenders?
Yes. Assemble the tenders uncooked on a parchment-lined baking sheet and freeze solid. Transfer to a zip-top bag and freeze for up to 2 months. Bake from frozen at 425°F / 218°C, adding 3-4 minutes to the cook time.
How long do Giada Crunchy Parmesan Chicken Tenders last in the fridge?
Cooked tenders keep for up to 3 days in an airtight container with paper towels between layers. For the best texture, reheat in the oven or air fryer rather than the microwave.
Why is my coating falling off the chicken?
Two likely causes: the chicken was not dried before breading, or you skipped the flour step. Pat the strips dry with paper towels and always dredge in seasoned flour before the egg wash for proper adhesion.
Can I use chicken thighs instead of breasts?
Yes. Boneless, skinless chicken thighs work well and stay even juicier. Cut them into similar 1-inch strips and bake at the same temperature — they may need 2-3 extra minutes to reach 165°F / 74°C.
What dipping sauces go best with these tenders?
Marinara, ranch, blue cheese, honey mustard, and garlic aioli all work well. The Parmesan crust pairs particularly well with a simple lemon-herb aioli or spicy sriracha mayo.
Can I make these ahead of time for a party?
Yes. Assemble the tenders up to the baking step and refrigerate on the rack, uncovered, for up to 4 hours. Bake just before serving. If baking ahead, reheat in a 375°F / 190°C oven for 5-7 minutes to restore crunch.
Wrapping Up
Giada Crunchy Parmesan Chicken Tenders deliver exactly what the name promises — a crisp, golden crust over juicy chicken in under 30 minutes. The wire rack and olive oil spray do the heavy lifting, so you get crunch without a deep fryer. Give them a try for your next weeknight dinner or game-day snack.
PrintCrunchy Parmesan Chicken Tenders
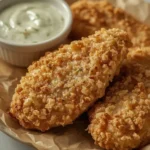
Crispy on the outside and juicy on the inside, these chicken tenders are coated in a crunchy Parmesan and panko crust. They’re baked until golden for a healthier twist on a classic favorite, perfect for a quick weeknight dinner or a crowd-pleasing appetizer.
- Prep Time: 15
- Cook Time: 15
- Total Time: 30
- Yield: 4 1x
- Category: Main Course
- Method: Baking
- Cuisine: Italian-American
Ingredients
- 1 1/2 pounds boneless, skinless chicken breasts, cut into 1-inch wide strips
- 1/2 cup all-purpose flour
- 2 large eggs, lightly beaten
- 2 tablespoons whole milk
- 1 cup panko breadcrumbs
- 1/2 cup freshly grated Parmesan cheese
- 1 teaspoon kosher salt
- 1/2 teaspoon freshly ground black pepper
- 1/2 teaspoon garlic powder
- 1/2 teaspoon paprika
- Olive oil cooking spray
Instructions
- Preheat oven to 425°F / 218°C. Line a rimmed baking sheet with aluminum foil and place a wire rack on top. Spray the rack generously with olive oil cooking spray to prevent sticking and promote even crisping.
- Set up a breading station: In a shallow dish, combine the flour with 1/2 teaspoon kosher salt and 1/4 teaspoon black pepper. In a second shallow dish, whisk together the eggs and milk until uniform. In a third shallow dish, combine the panko, Parmesan, remaining 1/2 teaspoon salt, remaining 1/4 teaspoon pepper, garlic powder, and paprika. Mix with a fork until evenly distributed.
- Pat the chicken strips dry with paper towels to remove excess moisture, which ensures the coating adheres properly. Season lightly with a pinch of salt and pepper on both sides.
- Dredge each chicken strip first in the seasoned flour, shaking off any excess. This dry layer helps the egg wash cling to the chicken.
- Next, dip the floured strip into the egg mixture, turning to coat completely. Allow any excess to drip back into the dish.
- Finally, press the chicken strip into the panko-Parmesan mixture, turning and pressing firmly to create an even, thick crust. Place the coated strip on the prepared wire rack. Repeat with remaining chicken, arranging tenders in a single layer without touching for best browning.
- Lightly spray the tops of the tenders with olive oil cooking spray. This step is critical for achieving a golden, crunchy crust instead of a pale, dry one.
- Bake in the preheated oven for 12-15 minutes, until the coating is deep golden brown and crisp. The internal temperature of the thickest tender should reach 165°F / 74°C when checked with an instant-read thermometer.
- Remove from the oven and let rest on the rack for 2-3 minutes before serving. This brief rest allows the crust to set and the juices to redistribute, preventing sogginess.
Notes
Storage: Leftover tenders can be refrigerated in an airtight container for up to 3 days. Reheat in a 375°F / 190°C oven on a wire rack for 5-7 minutes to restore crispness, or in an air fryer at 350°F / 175°C for 3-4 minutes. Avoid microwaving as it softens the crust. Freezing: Assemble uncooked tenders on a parchment-lined baking sheet and freeze solid. Transfer to a zip-top bag and freeze for up to 2 months. Bake from frozen at 425°F / 218°C, adding 3-4 minutes to the cook time.
Nutrition
- Calories: 395
- Sugar: 2g
- Sodium: 795mg
- Saturated Fat: 4g
- Carbohydrates: 28g
- Fiber: 1g
- Protein: 43g
- Cholesterol: 200mg
Keywords: Giada parmesan chicken tenders, crunchy chicken tenders, Parmesan crusted chicken, baked chicken tenders, healthy chicken tenders, easy dinner recipe, weeknight meal, chicken finger recipe